

How to Insulate Your Garage Before Winter Arrives
Winter in the Brazos Valley never lasts long, but the cold fronts that roll through in December and January hit hard enough to make an uninsulated garage feel like a walk in freezer. That space pulls heat away from the rooms next to it, drives up the power bill, and makes any project at the workbench miserable after sundown. Most homeowners start thinking about wall batts and attic depth, yet the garage door itself is almost always the largest uninsulated surface on the entire property, and it is the one part of the assembly that moves, flexes, and leaks air every single day. Handling it correctly takes a little planning, a modest material budget, and an honest look at what your existing door, springs, and opener can support once you add weight to the panels. Late summer and early fall are the right time to do the work, because supply is good, schedules are open, and nobody is racing a hard freeze. The steps below follow the same order a professional would use on a real job site, starting with the biggest heat losses and finishing with the small details that keep cold air from sneaking underneath. Along the way you will learn which upgrades genuinely lower your energy use and which ones only look impressive on a receipt.
What to Know Before You Insulate Your Garage for Winter
Insulating a garage is not the same job as insulating a bedroom, because a garage is a semi conditioned space that still needs ventilation, still gets exhaust fumes in it, and still has a giant moving panel on one wall. The goal is not to seal the room like a cooler; the goal is to slow heat transfer through the surfaces that touch your living space while keeping the room safe and breathable. Before buying a single roll of anything, walk the space and note where the garage shares a wall or ceiling with the house, since those are the surfaces that pay you back the fastest. Check for a gas water heater or a furnace in the garage, because combustion appliances need a supply of fresh air and their vents must never be blocked or buried under insulation. Look at your garage door and read the label on the inside of a panel to find out what you already have, since many builder grade doors from the last twenty years contain nothing at all between the steel skins. Finally, take a hard look at the perimeter of the opening, where the majority of the felt cold in a garage actually comes from. A thorough plan built in September saves both money and frustration in December.
How to Insulate Your Garage Door Before Winter
Your garage door is usually somewhere between one hundred and forty and two hundred square feet of surface area, and on a single layer steel door that surface carries an R value of roughly 0.5 to 1, which is barely better than an open window in terms of heat transfer. That number matters because R value measures resistance to heat flow, and a low number means the cold outside air is cooling the steel skin, which then cools the air inside your garage all night long. Adding insulation to that door is the single highest impact move available to most homeowners, and it changes how the space feels within a day of installation. There are two honest paths forward, which are retrofitting an insulation kit onto your existing door or replacing the door with a factory insulated model. Both approaches work, though they carry very different price tags, performance levels, and effects on the hardware that lifts the door. Understanding the difference before you buy keeps you from spending money twice. A quick inspection of your current door will tell you which path makes sense for your home.
Retrofit kits use rigid polystyrene boards or vinyl faced fiberglass batts that fit into the recessed area of each panel section, and a good kit will bring a bare steel door up to somewhere around R 4 to R 8 depending on thickness and material. Installation involves cutting each piece slightly oversized so it presses into the panel frame, then securing it with the retainer clips or adhesive pins included in the box. The work itself is straightforward for a patient homeowner with a utility knife, a straightedge, and a free Saturday morning. What people underestimate is the weight, because a full kit adds roughly ten to thirty pounds across the door, and every ounce of that has to be lifted by springs that were calibrated at the factory for the original panel weight. An unbalanced door drags on the opener, wears the drum cables unevenly, and shortens the life of every moving part attached to it. The fix is simple when handled correctly, since a technician can measure the new weight and adjust or replace the springs to match. Skipping that step is where most retrofit projects go wrong.
Factory insulated doors take a different approach and generally outperform any retrofit by a wide margin. A polystyrene filled door typically lands in the R 6 to R 9 range, while a door built with injected polyurethane foam bonded between two steel skins commonly reaches R 12 to R 18 or higher depending on panel thickness. Polyurethane expands during manufacturing and adheres to both skins, which does more than insulate; it stiffens the whole section, reduces flex on windy days, and noticeably quiets the door as it travels the track. Those doors also hold their shape better over decades of use, resist denting from a stray basketball, and hold paint longer because the panel does not oil can in the heat. The tradeoff is upfront cost, since an insulated door with quality hardware runs meaningfully more than a bare single layer replacement. For a garage attached to living space, especially one with a bonus room overhead, the comfort difference justifies the spend for most families. Need a door built to handle cold snaps and Texas heat alike? Click here for our garage door installation service.
Insulating Your Garage Walls and Ceiling Before Winter
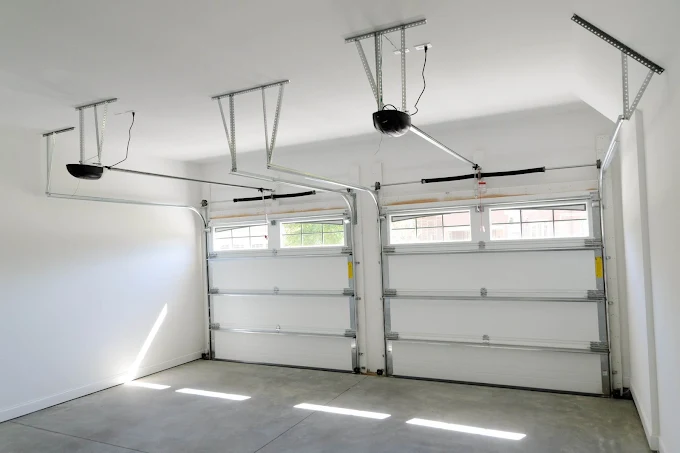
The walls and ceiling of a garage deserve attention right after the door, and the priority order is easy to remember, because you start with any surface that separates the garage from a heated room. That means the common wall between the garage and the house, the ceiling under a bonus room or bedroom, and the attic access hatch if one is cut into the garage ceiling. Those shared surfaces are the ones stealing comfort from spaces you actually pay to heat, so insulating them lowers your bill in a way you can measure on the statement. Exterior garage walls come next, and they matter most for people who use the garage as a shop, a gym, or a place where the dog sleeps. Standard two by four framing takes an R 13 or R 15 batt, while two by six framing accepts R 19 or R 21, and the batt must fill the cavity completely from stud to stud without gaps at the top and bottom plates. Compressing insulation to force it behind a wire or a pipe destroys much of its value, so split the batt around the obstruction instead. Careful installation is what separates a wall that performs from a wall that just contains material.
Fire safety rules apply in an attached garage, and they are not optional suggestions. Residential code requires gypsum board on the garage side of the wall separating the garage from the residence, typically half inch board, and it requires 5/8 inch Type X board on a garage ceiling when habitable space sits above it. That requirement exists because a garage stores vehicles, fuel, chemicals, and equipment, and the assembly is meant to buy the family time to get out. Rigid foam board is a popular insulation choice in garages for its high R value per inch, though exposed foam is not permitted as a finish surface and must be covered by an approved thermal barrier such as gypsum board. Homeowners sometimes staple up foam panels and call the job finished, which creates a real hazard in the exact room where fires most often start. Doing the work right means insulating the cavity and then covering it properly with drywall. The finished wall looks better anyway and gives you something solid to hang shelving on.
Moisture control rounds out the wall and ceiling work, and our climate zone here in Central Texas calls for a light touch rather than a heavy vapor barrier. Kraft faced batts work well in this region with the facing turned toward the conditioned side of the assembly, and doubling up on vapor barriers should be avoided because trapped moisture between two impermeable layers has nowhere to dry. Seal the top plate penetrations, the gaps around plumbing, and any holes drilled for wiring using canned foam or caulk before the insulation goes in. If your garage has an attic above it with a pull down ladder, insulate and weatherstrip that hatch, since a bare plywood door is a direct hole between conditioned air and an attic that swings forty degrees in a day. Pay attention to the band joist area on garages built over a crawl space, as that gap often sits wide open behind the sill. Small air sealing details compound into real savings across a winter. The material cost for all of it is minor compared to the comfort it delivers.
Sealing Air Leaks When You Insulate Your Garage for Winter
Insulation slows conduction, but air leakage is a separate problem, and in most garages it accounts for more of the cold you feel than the R value of any surface. Cold air moves through gaps, and a garage has more gaps than any other room in a typical house because it was framed for a vehicle rather than for comfort. Start your leak hunt at the garage door opening, then work around the service door, the windows, and the point where the walls meet the slab. On a breezy afternoon you can find most of them by walking the perimeter with the door closed and holding the back of your hand near each joint. A cheap incense stick works even better, since the smoke will bend visibly toward any active draft. Write down every leak you find before you start buying materials so you make one trip instead of four. Sealing is inexpensive work with an immediate payoff.
The stop molding that runs down both jambs and across the header holds the vinyl weatherseal that presses against the face of your door, and that vinyl gets brittle and cracks after several summers of direct sun exposure. Replacement molding comes in wood backed and vinyl versions, installs with nails or screws, and should compress against the door panel just enough to block light without dragging hard enough to interfere with travel. Stand inside the closed garage in the middle of the day and look for daylight along the edges, because any light you see is air moving through. Do not forget the top section, since the header seal is the piece homeowners most often overlook. Adjust the molding so the seal contacts the door evenly from top to bottom rather than pinching at one corner. A properly gapped seal lasts longer and lets the door close smoothly. This one repair often makes a bigger comfort difference than a full insulation kit.
The bottom of the door needs its own attention, and it involves two separate components that work together. The bottom seal, sometimes called the astragal, is the flexible rubber or vinyl strip that slides into a retainer on the bottom section, and it should be soft enough to flatten and conform to the concrete when the door rests closed. Old seals harden, tear at the ends, and leave gaps at the corners where mice and cold air both come in. The second component is a threshold seal, which is a raised strip bonded to the garage floor that gives the bottom seal something to press against, and it also blocks blowing rain and helps keep water out during Texas storms. Uneven or sloped concrete makes a threshold especially valuable, since the door alone cannot bridge a low spot. Between the two pieces you can close a gap that previously ran the full width of the opening. Both items are affordable and both are things a technician can handle in a single visit.
How to Insulate a Garage Door Without Throwing Off the Door Balance
Adding insulation to a garage door changes the physics of how that door operates, and this is the part of the project homeowners almost never plan for. A sectional garage door is a counterbalanced system, which means torsion or extension springs store energy and offset the weight of the panels so the door feels nearly weightless in your hands. Those springs were sized at the factory for a specific door weight, and adding twenty five pounds of material makes the door heavier than what the spring system was designed to lift. The opener then picks up the difference, straining a motor and gear assembly that were never rated to carry the load of the door itself. Symptoms show up gradually as slower travel, a door that drifts closed when stopped halfway, or an opener that hums and struggles near the top of the opening. The correct move is to weigh the door after insulating and match the springs to the new weight. Doing that keeps the whole system running the way the manufacturer intended.
Garage Door Insulation Kits and the Weight They Add
A retrofit garage door insulation kit is a reasonable choice for a door in good structural condition with panels that are not dented, rusted, or separating at the joints. The material comes as rigid boards or as faced batts, and both types are cut to fit into the recessed rectangles formed by the panel stiles and rails. Take your measurements panel by panel rather than assuming every section is identical, because door manufacturers frequently use a different bottom or top section. Cut each piece about a quarter inch oversized so it wedges into place and stays put under its own tension. Work from the bottom up with the door closed, and check that nothing you install interferes with the hinges, the rollers, or the strut brackets. A clean installation looks tidy and holds for years. A rushed one buckles, falls loose, and jams the door in the tracks.
The weight question deserves a straight answer, since it determines the safety of the finished job. Most kits add between ten and thirty pounds depending on the size of the door and the density of the material, and while that may sound minor next to a door that already weighs one hundred and fifty pounds, spring systems are calibrated in fairly tight increments. You can test balance yourself with a simple check that takes two minutes. With the door fully closed, pull the emergency release cord to disconnect the opener, then lift the door manually to about waist height and let go slowly. A balanced door holds its position; an unbalanced door either sinks toward the floor or drifts upward on its own. If it moves, the springs need adjustment.
Torsion springs are the single most dangerous component on a residential garage door and they are the reason this specific task belongs with a trained technician. A wound torsion spring stores an enormous amount of energy under tension, and releasing that energy without the proper winding bars and technique causes severe injuries every year in this country. Adjustment also requires accurate math, because the spring must match the door weight, the drum size, and the height of the opening to deliver correct counterbalance. A technician will weigh the door on a scale, calculate the required inch pounds of torque, and either adjust the existing spring or install a properly rated replacement. That same visit is a good time to check the cables, the drums, the bearings, and the end bearing plates for wear. Adding insulation and updating the springs together gives you a door that is both efficient and safe. Adding weight to your door this fall? Click here for our garage door spring repair service.
Garage Door Insulation Built Into Factory Polyurethane Panels
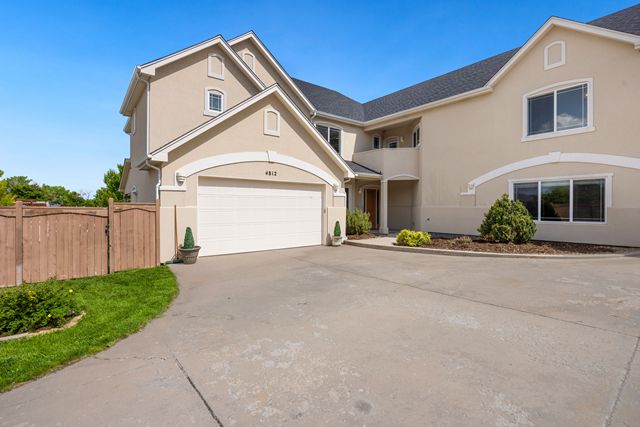
Factory insulated doors solve the balance problem before it exists, because the manufacturer builds the door, weighs it, and ships it with a spring system rated for that exact weight. There is no guesswork, no retrofit math, and no risk of an opener carrying a load it was never sized to handle. The construction itself is also fundamentally better than anything you can add after the fact, since polyurethane foam is injected as a liquid and expands to fill every void inside the section. That expansion bonds the foam to both steel skins and creates a structural sandwich panel with real rigidity. Doors built this way flex less in wind, resist denting far better, and hold up under daily cycling for decades. The quiet operation surprises most people the first time they hear one close. It is a noticeable upgrade in a house where a bedroom sits above the garage.
R value is where the performance gap becomes obvious in numbers. Polystyrene filled doors generally land between R 6 and R 9, while two inch polyurethane doors commonly reach R 17 or R 18, and even the thinner polyurethane models outperform most retrofit kits by a comfortable margin. Keep in mind that the R value printed on a brochure describes the door section itself and not the installed assembly, so the perimeter seals and the bottom seal still determine how the door performs in real conditions. A high R value door with a cracked weatherseal will still let cold air pour in around the edges. Manufacturers also list a U factor on some models, which measures heat transfer for the complete assembly and gives a more realistic picture. Ask about both numbers when you shop. Understanding the specification prevents disappointment after installation.
Replacement makes the most sense in a handful of specific situations, and being honest about those situations saves homeowners money. A door with rusted bottom sections, cracked panels, delaminated skins, or repeated repair history is a poor candidate for insulation, since you would be investing in a door already near the end of its service life. Doors over twenty years old often lack modern safety features and use hardware that is difficult to source. A garage attached to living space, or one converted into a workshop or gym, gets enough daily benefit from a real insulated door to justify the cost quickly. Homes with a bonus room or bedroom over the garage see the biggest comfort gain of all. For a detached garage used mostly for storage, a retrofit kit and fresh weatherseals may be all the situation calls for. Matching the solution to the actual use is what keeps the project sensible.
Garage Door Insulation Fails Without Working Weatherstripping
An insulated garage door with worn seals is a partially finished project, because the panels and the perimeter are two halves of the same system. Heat transfer through the steel is only one path, and air movement around the edges is the other, often larger one. Vinyl weatherseal shrinks and hardens under UV exposure, and here in Texas the sun does that work faster than in most of the country. Bottom seals wear from the friction of thousands of cycles against concrete, and they tear at the ends where the retainer meets the stile. Inspect all of it during the same project that adds your insulation so you finish the job in one pass. A good technician checks these components automatically during any service call. The parts themselves cost very little compared to the comfort they protect.
Cold weather introduces a problem specific to the bottom seal that catches homeowners off guard every January. Moisture on the concrete freezes overnight and bonds the rubber seal to the slab, and when the opener tries to lift, it strains against a door that is physically stuck to the floor. That resistance can strip an opener gear, snap a cable, or trip the force setting and leave the door partially open. Keeping the area under the door dry and free of debris helps, and a threshold seal that sheds water away from the joint helps more. If you find the door frozen down, break the bond at the edges by hand rather than repeatedly pressing the wall button. Repeated attempts under load are what turn a small annoyance into a repair bill. A flexible seal in good condition is far less likely to bond in the first place.
Cold also affects the rest of the hardware in ways worth planning for during your fall preparation. Grease stiffens as temperatures drop, so any old or heavy lubricant on the rollers, hinges, and springs should be cleaned off and replaced with a lithium or silicone based garage door lubricant that stays workable in cold conditions. Never use general purpose spray solvent as a lubricant, because it strips existing grease and leaves the bearings dry. Steel contracts slightly in cold weather, which can change how much force the opener needs and cause a properly working door to reverse unexpectedly. Photo eye sensors also drift out of alignment as brackets shift, and a misaligned sensor will stop the door from closing entirely. Running through these items in October means fewer problems when the first real front arrives. Want your door sealing tight and running right this winter? Click here for our garage door repair service.
Why You Need a Professional to Insulate Your Garage Before Winter
Plenty of garage insulation work is homeowner friendly, and there is nothing wrong with cutting foam board on a Saturday and stuffing batts between studs. The line worth respecting sits at the door itself, where springs, cables, drums, and a powered opener combine into a system that can cause serious injury when handled incorrectly. A professional brings the scale to weigh the door, the winding bars to adjust springs safely, and the experience to spot the worn cable or cracked hinge that would have failed in February anyway. That visit also gives you an accurate picture of what your existing door can support before you spend money on materials it cannot handle. Secure Overhead Door serves College Station, Bryan, Navasota, Brenham, Caldwell, Hearne, and Madisonville with straight answers and no pressure to buy something you do not need. Getting it done before the first freeze is always cheaper than getting it done during one.
Signs You Need a Professional to Insulate Your Garage Before Winter
Certain symptoms tell you the door needs professional attention before any insulation goes on it. A door that will not stay put at waist height after you disconnect the opener is already out of balance, and adding weight to it makes the problem worse rather than better. Grinding, popping, or scraping sounds during travel point to worn rollers, dry bearings, or a bent track that needs correction first. Uneven closing, where one side touches the floor before the other, usually indicates a cable or drum issue that will not resolve on its own. Any of these signs means the job starts with a repair rather than an upgrade.
Visible damage to the door itself changes the calculation entirely. Rust along the bottom section, panels that flex noticeably in the middle, separated seams, or dents deep enough to catch on the track all suggest a door nearing the end of its useful life. Spending several hundred dollars insulating a door with three years left in it is not a good investment for anyone. A technician can tell you honestly which category your door falls into after a short inspection. That answer is worth having before the money goes out the door.
Opener behavior gives you the third set of clues, and it is often the first thing homeowners notice. A motor that hums, hesitates, or reverses partway through travel is fighting something, and the cause is almost always a balance or friction problem rather than the opener itself. Older chain drive units with limited horsepower struggle with heavier insulated doors even when the springs are correct. Force settings and travel limits sometimes need adjustment after any change to the door. Sorting the opener out during the same visit keeps everything working as one system.

What Professional Garage Door Insulation Service Includes Before Winter
A proper service visit starts with a full inspection rather than a sales pitch. The technician checks the springs for wear and rust, examines the cables for fraying at the drums, tests the rollers and hinges for play, and confirms the tracks are plumb and properly spaced. Door balance gets tested by hand with the opener disconnected, and the door gets weighed when insulation is part of the plan. Safety features come next, including the photo eye sensors and the automatic reverse function required on every residential opener. Nothing gets installed until the mechanical side of the door checks out.
The insulation and sealing work follows in a logical order. Panels get measured individually, material gets cut to fit tight, and retainers hold everything securely against the steel. Perimeter stop molding and vinyl weatherseal get replaced where the old material has hardened or cracked, and the seal is set to make even contact along the full height of the opening. Bottom seals and threshold pieces get fitted to match the actual condition of your slab. Every component is checked with the door in motion before the visit ends.
Spring adjustment closes out the job and ties the whole system together. With the new door weight known, the technician calculates the correct counterbalance and adjusts or replaces springs to match that number precisely. The door then gets cycled several times to confirm smooth travel, correct stopping points, and proper opener force. Lubrication goes on the rollers, hinges, and springs using a product rated for cold weather. You end up with a door that seals well, lifts easily, and is ready for the season.
Why Choose Secure Overhead Door to Insulate Your Garage Before Winter
Secure Overhead Door operates out of 360 Graham Rd Suite 112 in College Station and covers the Brazos Valley with both residential and commercial garage door solutions. We handle spring replacement, opener repair, new door installation, weatherseal work, dock levelers, and hangar doors, which means one company can take care of everything the season requires. Free estimates on repair and installation let you plan the project with real numbers instead of guesses. Financing is available through Hearth Financing when a full door replacement makes the most sense for your home. Emergency service is available 24/7 for the times a door fails at the worst possible moment.
Our approach centers on honest service without unnecessary upselling, and that is not a slogan we treat lightly. When a retrofit kit and a set of fresh seals will solve your problem, that is what we recommend, and we will tell you plainly when a door is worth keeping. When a door has reached the end of its life, we explain exactly why and show you what we found. Every recommendation comes with the reasoning behind it. You make the decision with complete information in front of you.
Quality work focused on long term performance is the standard we hold ourselves to on every job, from a single spring replacement to a full insulated door installation. We are dedicated to providing five star service every time, and repeat customers across College Station and Bryan are the measure we watch. Call (979) 383-2445 or email derick@secureoverhead.com to schedule your inspection before the first cold front arrives. Fall appointments fill up as soon as temperatures start dropping. Getting on the schedule early means your garage is ready when winter finally shows up.