

How to Seal the Gap at the Bottom of Your Garage Door
A gap at the bottom of your garage door lets in far more than a little daylight, and in the Brazos Valley that opening becomes a highway for rain, dust, wasps, field mice, and the kind of humidity that ruins stored tools and cardboard boxes within a single season. Most homeowners in College Station and Bryan first notice the problem in late summer, when afternoon storms push water across the driveway and straight under the door, or when the August heat makes the garage feel like an oven because conditioned air from the house keeps leaking out through the same opening. The good news is that sealing the bottom of a garage door is one of the most affordable improvements you can make, and it usually comes down to replacing a worn bottom seal, correcting the threshold, or fixing the underlying door problem that created the gap in the first place. The bad news is that a gap almost always means something else changed, because garage doors do not develop uneven gaps on their own without a reason. Cracked concrete, a bent bottom section, uneven cable tension, or a misaligned track will all show up as light along the floor line. Knowing which cause you are dealing with determines whether a twenty dollar seal solves the issue or whether the door needs a professional adjustment first. This guide walks through both sides of the job so you can seal the gap correctly and keep it sealed.
What Causes a Gap at the Bottom of Your Garage Door
The bottom seal, sometimes called the astragal or bottom weatherstrip, is a flexible strip of rubber or vinyl that slides into a retainer along the bottom edge of the door and compresses against the floor when the door closes. Sunlight, ozone, temperature swings, and the constant flex of daily use all break that material down over time, and in Texas heat most bottom seals harden and crack within five to seven years. When the seal loses flexibility it stops conforming to the concrete, and the gap you see is simply the space it can no longer fill. That said, a hardened seal is only one possibility among several, and homeowners frequently replace the weatherstripping only to find the gap still there. Uneven floors, settled slabs, damaged bottom sections, and cable imbalance all create gaps that no amount of new rubber will fix. Diagnosing the cause first saves you from buying the wrong part twice. The three sections below cover the causes we see most often on service calls throughout Brazos, Burleson, Grimes, and Washington counties.
Worn Weatherstripping Causing the Gap at the Bottom of Your Garage Door
The most common reason for a gap along the floor is a bottom seal that has simply reached the end of its service life, and it is easy to confirm with a quick inspection. Close the door, then look at the seal from inside the garage with the lights off during daylight hours, because any light coming through tells you exactly where the seal has failed. Next, press on the rubber with your thumb and see how it responds; a healthy seal feels pliable and springs back, while a failing one feels stiff, chalky, or brittle and may crumble slightly under pressure. Cracks running lengthwise along the bulb, tears at the corners, and sections that have flattened permanently are all signs the material has lost its memory and can no longer compress and rebound. Rodent damage shows up as chewed notches, usually near one end where an animal found a soft spot and worked its way in. Once the seal fails in one place, moisture and pests find that spot quickly and the damage spreads.
Weatherstripping fails faster on doors that face south or west in our area because those doors absorb direct afternoon sun for hours at a time, and surface temperatures on a dark metal door can exceed 140 degrees on a July afternoon. That heat cycles the rubber every single day, driving out the plasticizers that keep it flexible, and after enough cycles the material hardens permanently. Vinyl seals tend to degrade faster than rubber ones under those conditions, which is why we generally recommend EPDM rubber replacements for homes in College Station and Bryan rather than the cheapest vinyl option on the shelf. EPDM handles UV exposure and temperature extremes much better and typically lasts several years longer in the same conditions. The cost difference at purchase is small, usually a few dollars for a standard sixteen foot door, and the difference in lifespan easily justifies it.
Another thing worth checking is the retainer itself, because the seal does no good if the aluminum channel holding it has been damaged. Look along the bottom edge of the door for a U-shaped or double-U-shaped aluminum track, and run your hand along it feeling for dents, twists, or spots where the lip has been bent outward. Backing a vehicle into the door, running over an object with the door closing, or years of corrosion from standing water can all deform that retainer enough that the seal will not seat properly or will pull loose repeatedly. A damaged retainer needs to be replaced along with the seal, and on some doors that means removing the bottom brackets, which are under spring tension through the lift cables. That specific task is not a safe DIY project, and it is one of the situations where calling a technician is the right decision rather than an optional upgrade.
Concrete and Floor Problems Creating the Gap at the Bottom of Your Garage Door
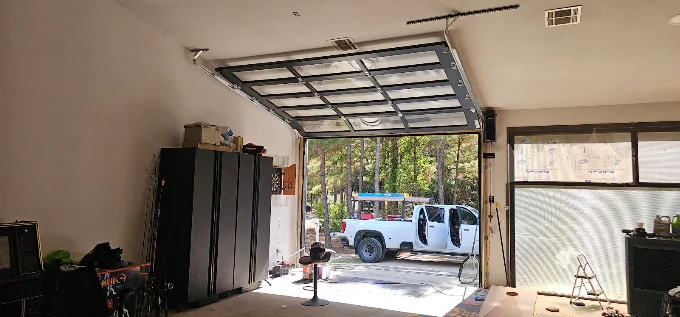
Garage floors are not perfectly flat, and in this part of Texas the expansive clay soils underneath them guarantee movement over the life of a home. Slabs settle, heave during wet seasons, and crack along stress lines, and the result is a floor that may sit a half inch lower on one side of the opening than the other. A standard bottom seal compresses roughly a half inch to an inch depending on the profile, so a floor deviation larger than that leaves a visible gap no matter how new the weatherstripping is. Check for this by closing the door and sliding a tape measure or a piece of paper under it at several points across the width, noting where it slides freely and where it stops. Mapping the gap this way tells you immediately whether you are dealing with a seal problem or a floor problem, because a worn seal usually leaks in patches while a settled floor produces a gap that grows steadily toward one side.
When the floor is the culprit, the fix is usually a threshold seal rather than a taller bottom seal, and the distinction matters. A threshold seal is a rubber or vinyl ramp that adheres directly to the concrete under the door, forming a raised barrier that the door seal presses against when closed. Because it sits on the floor, it can span low spots, bridge minor cracks, and give the door a consistent surface to seal against across the full width of the opening. Threshold seals also help significantly with water intrusion on driveways that slope toward the garage, which is a common issue on older properties around Bryan and in newer subdivisions where drainage was an afterthought. Installation is straightforward with a good construction adhesive, a clean and dry slab, and enough cure time before you close the door on it. Give the adhesive at least twenty-four hours in dry conditions and longer if humidity is high.
There is a limit to what a threshold can correct, and homeowners should know where that limit sits before spending money on materials. Thresholds are designed to handle deviations of roughly a half inch to an inch, and beyond that range you are better off addressing the concrete itself through grinding, patching, or leveling compound. Large gaps caused by significant slab settlement sometimes need a contractor rather than a garage door company, though we are happy to look at the situation and tell you honestly which trade you need. One caution worth repeating: a threshold seal creates a small dam at the door opening, which means water that gets into the garage from another direction has a harder time draining out. If your garage takes on water from a side door or from the back wall, solve that drainage first so you are not trapping water inside.
Door Alignment and Section Damage Behind the Gap at the Bottom of Your Garage Door
A gap that appears on only one side of the door, with the bottom edge visibly angled rather than parallel to the floor, points to a problem with how the door is hanging rather than with the seal. This usually traces back to the lift cables, which run from the bottom brackets up to the drums on the torsion shaft and carry the entire weight of the door. If one cable has stretched, slipped a wrap on its drum, or been set at a different tension than the other, one side of the door will sit lower than the other every time it closes. You can spot this from inside the garage by comparing the cable tension on both sides with the door fully open, though the diagnosis is easier than the repair. Cable and drum adjustments involve releasing and resetting torsion spring tension, and that work carries real injury risk without the right tools and training.
Damage to the bottom section itself produces a similar result and is common on doors that have been struck by a vehicle or that have absorbed years of moisture along the bottom edge. Steel doors rust from the inside out along that edge because water collects in the seam and sits there, and by the time you see bubbling paint the metal underneath has usually thinned considerably. Wood doors rot in the same location for the same reason, and the swelling and shrinking that comes with moisture cycling warps the section until it no longer meets the floor evenly. Press along the bottom edge of the section and look for soft spots, flexing, or areas where the surface gives more than it should. A bowed or corroded bottom section will not seal properly regardless of what weatherstripping you install, and replacing that single section is often more economical than replacing the whole door.
Track misalignment rounds out the list of alignment issues that show up as a floor gap. Vertical tracks that have been knocked out of plumb, loosened at the jamb brackets, or bent near the bottom will hold the door away from the opening on that side, which lifts one corner slightly and breaks the seal. Check that the tracks are parallel to each other and that the rollers sit centered in the track without binding along the travel path. Loose lag screws in the jamb brackets are common and easy to tighten, but bent track sections should be replaced rather than hammered back into shape because straightened track never holds its geometry. Seeing a gap that is worse on one side, or a door that does not close evenly? Click here for our garage door repair service and we will diagnose the actual cause.
How to Seal the Gap at the Bottom of Your Garage Door Correctly
Once you know what is causing the gap, the repair itself follows a predictable process, and most homeowners with basic tools can handle a straightforward seal replacement in under an hour. The key is matching the right product to the right problem, because the three main solutions each address different situations and using the wrong one wastes money and effort. A bottom seal replacement handles worn weatherstripping on a door that otherwise closes evenly. A threshold seal handles uneven or damaged concrete. Brush seals and side stops address gaps that extend up the sides of the opening rather than along the floor. Working through the correct product selection first means you buy once and install once, which is how the job should go.
Choosing the Right Product to Seal the Gap at the Bottom of Your Garage Door
Bottom seals come in profiles that must match your door’s retainer, and buying the wrong profile is the single most common mistake homeowners make on this project. The most common types are the T-style, which uses a single T-shaped rib that slides into one channel; the double-T or twin-T, which has two ribs sliding into a double-channel retainer; the bead-end or bulb style, which uses round beads on each edge; and the U-shaped seal for doors with a simple slotted retainer. Pull a short section of your existing seal out of the channel and look at the end profile before ordering anything, or photograph the retainer opening from the end of the door. Width matters just as much as profile, because seals come in sizes from roughly two inches up to six inches or more, and a seal that is too narrow will not compress against the floor. Measure the door width as well and buy a length that gives you a few extra inches to trim.
Material choice deserves real thought given our climate, and the options break down into a few categories with meaningful differences. EPDM rubber is the best all-around performer for College Station conditions because it stays flexible from below freezing up through extreme summer heat and resists UV degradation better than most alternatives. Thermoplastic elastomer, often labeled TPE, is a mid-grade option that costs less and performs adequately, though it typically has a shorter lifespan under direct sun. Standard PVC or vinyl is the least expensive and the least durable, and it tends to harden and crack within a few Texas summers. For a door you plan to keep for years, the higher grade material pays for itself simply by not needing replacement twice as often. Look for seals rated for cold weather flexibility as well, since that rating generally indicates better polymer quality overall.
Threshold seals and side or top weatherstripping fill the gaps that a bottom seal cannot reach, and a complete seal package usually involves more than one product. Threshold seals should be sized to your door width and chosen with a profile height appropriate to the gap you measured, with taller profiles available for larger deviations. Perimeter weatherstripping, the vinyl-flanged strip that nails to the outside of the door jambs, seals the sides and top and should be replaced at the same time since it degrades on the same schedule. Brush seals mounted to the jambs work well on commercial doors and on residential doors where debris and pests are the main concern. Want to add sealing to a broader tune-up? Click here for our garage door maintenance and repair services and we will handle the full perimeter in one visit.
Step by Step Installation to Seal the Gap at the Bottom of Your Garage Door
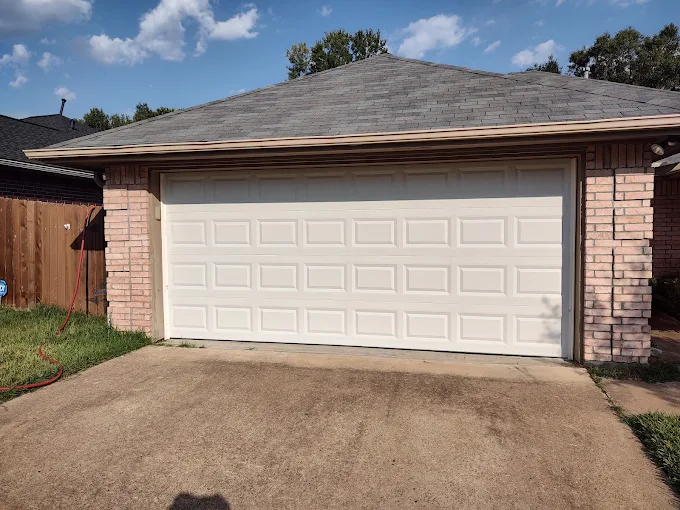
Start by opening the door about three to four feet so the retainer sits at a comfortable working height, then engage the manual lock or clamp locking pliers onto the track just below a roller on each side. This step is not optional, because a door that slides down while your hands are in the retainer channel can cause serious injury, and the safety cost of skipping it is far higher than the thirty seconds it takes. Disconnect power to the opener at the outlet as well so nobody trips a remote while you are working. With the door secured, grip one end of the old seal and pull it out of the retainer channel, working steadily rather than yanking, and expect the rubber to tear if it has hardened. Clean the channel thoroughly with a wire brush, removing dirt, old rubber fragments, insect nests, and corrosion, because a clean channel makes the new seal slide in far more easily.
Feed the new seal into the retainer from one end, aligning the ribs with the channels, and apply a light spray of silicone lubricant or soapy water to the ribs to reduce friction. Pull steadily from the opposite end rather than pushing from the near end, because pulling keeps the seal straight and prevents it from bunching partway through. On a standard sixteen foot double door, having a second person pull while you feed makes the job noticeably faster and reduces the chance of the seal folding over inside the channel. Work in comfortable temperatures if you can, because a seal that has been sitting in a hot truck will be more pliable while a cold one will fight you the entire way. Once the seal is fully through, center it so it extends slightly past each end of the door, then trim the excess with a sharp utility knife leaving about a quarter inch overhang on each side.
Threshold installation follows a different sequence and starts with thorough surface preparation. Sweep and then pressure wash or scrub the concrete where the threshold will sit, removing oil stains, loose material, and any old adhesive, then let the slab dry completely before proceeding. Dry-fit the threshold with the door closed to confirm placement, marking the location with a pencil line so you know exactly where the adhesive goes. Apply construction adhesive in continuous beads according to the manufacturer’s spacing, set the threshold onto the marks, and weight it down along its full length with bricks, sandbags, or lumber. Leave the door open and the weight in place for the full cure time listed on the adhesive, typically twenty-four hours or more, and resist the temptation to close the door early to check your work.
Testing and Maintaining the Seal at the Bottom of Your Garage Door
Once the new seal is installed, close the door completely and run the same light test you used for diagnosis, standing inside with the lights off and looking for daylight along the floor line. A properly installed seal should show no visible light and should compress evenly across the entire width, with the bulb or lip flattening slightly against the concrete rather than standing rigid. Slide a sheet of paper under the door at several points and confirm you meet resistance everywhere; anywhere the paper slides freely, the seal is not making contact. If you find contact gaps after a fresh install, the likely causes are an undersized seal profile, remaining floor deviation that needs a threshold, or a door alignment issue that the new rubber cannot compensate for. Address the underlying cause rather than stacking a second seal on top of the first, which never works well and looks worse.
Test the opener’s safety reverse after any work near the bottom of the door, because the added thickness of a new seal changes where the door contacts the floor and can affect the down-force setting. Place a two-by-four flat on the floor in the door’s path, close the door, and confirm it reverses promptly on contact. Check the photo eye sensors at the same time by waving an object through the beam while the door closes. If the door now stops short or reverses without hitting anything, the travel limits need adjustment to account for the new seal thickness, which is a simple settings change on most modern openers. Skipping these checks after a seal replacement is a common oversight and one that matters, since safety reverse is the system that protects children and pets.
Ongoing maintenance keeps a new seal working for years rather than months, and it takes very little effort. Wipe the seal down a few times a year to remove grit and debris that grind against the rubber every cycle, and apply a silicone-based lubricant to keep the material conditioned and prevent it from freezing to the concrete during the occasional Texas cold snap. Never use petroleum-based products on rubber seals, because petroleum breaks down the polymer and will destroy a good seal faster than sunlight does. Keep the area under the door swept clear of rocks, mulch, and leaves that would otherwise hold the seal open or cut into it. Inspect the seal each spring and fall along with the rest of the door hardware, looking for early cracking so you can plan a replacement before the next storm season arrives.
Why You Need Professional Help Sealing the Gap at the Bottom of Your Garage Door
Plenty of bottom seal replacements go smoothly as a weekend project, and we would never tell a capable homeowner not to try one. The situations that call for a professional are the ones where the gap is a symptom rather than the problem, and those are more common than most people expect. Uneven gaps, doors that bind while closing, damaged bottom sections, corroded retainers, and any issue touching the cables or springs all fall into that category. A technician can diagnose the real cause in a single visit and correct it properly, which costs less than replacing parts repeatedly while the underlying issue continues to work against you. Secure Overhead Door serves College Station, Bryan, and the surrounding Brazos Valley communities with the equipment and experience to handle every part of the job.
Safety Risks When Sealing the Gap at the Bottom of Your Garage Door
The bottom brackets on a garage door are attached to the lift cables, and those cables carry spring tension that can exceed several hundred pounds of force on a typical residential door. Loosening a bottom bracket while the springs are wound sends that bracket flying with enough energy to cause severe injury, and this is the single most dangerous mistake homeowners make on garage door projects. Any repair that requires removing or repositioning a bottom bracket, including retainer replacement on many door models, belongs to a trained technician with the right winding bars and clamps.
Torsion springs present the same category of risk and should never be adjusted without proper tools and training. If a gap traces back to spring fatigue, cable slippage, or drum misalignment, the correct repair path starts with releasing and resetting spring tension in a controlled way. Homeowners who attempt this with screwdrivers or improvised bars are the reason emergency rooms see garage door injuries every year. Dealing with a spring or cable problem behind your door gap? Click here for our garage door spring repair service and let a trained technician handle the tension safely.
Even the routine parts of the job carry risk worth respecting. Doors that slide down while unsecured, utility knives slipping while trimming seal ends, and ladders on uneven garage floors all account for real injuries on what people assume are simple tasks. Securing the door with locking pliers, disconnecting opener power, and working with a helper on wide doors eliminate most of that exposure. When in doubt about any step, stopping and calling is always the cheaper decision.

What Professional Sealing Service Covers for the Gap at the Bottom of Your Garage Door
When we handle a seal replacement, the visit includes a full inspection of the door rather than just the strip along the bottom. We measure the floor across the opening, check the door for level and plumb, inspect the bottom section for corrosion or damage, and verify cable tension on both sides before recommending anything. That diagnostic work is what separates a repair that lasts from one that fails again in six months. If the gap traces to concrete, we will tell you and recommend the right threshold height for your measurement.
The materials matter as much as the labor, and we stock commercial-grade EPDM seals in the profiles that match the doors common throughout this area. Homeowners buying from a big box store are usually choosing between two or three generic options, while a supply house carries the specific profile your retainer was designed for. Correct profile matching means the seal seats fully, holds its position through thousands of cycles, and compresses the way the manufacturer intended.
We also handle the perimeter as part of the same visit when it makes sense, since side and top weatherstripping age on the same schedule as the bottom seal. Sealing only the floor while leaving cracked vinyl on the jambs leaves the garage nearly as exposed as it was before. Doing the full perimeter at once costs less than two separate visits and gives you a garage that actually stays dry, cool, and pest-free.
Why Choose Secure Overhead Door to Seal the Gap at the Bottom of Your Garage Door
Secure Overhead Door operates out of 360 Graham Rd Suite 112 in College Station and serves homeowners and businesses across Bryan, Navasota, Brenham, Caldwell, Hearne, and Madisonville. We built this company on honest service without unnecessary upselling, which means if your gap needs a forty dollar seal rather than a new door, that is exactly what we will tell you. Free estimates on repair and installation let you get a real answer before committing to anything.
Our technicians handle residential and commercial work, from a single-car garage in a College Station neighborhood to dock levelers and hangar doors on commercial properties throughout the Brazos Valley. Emergency service is available twenty-four hours a day for the situations that cannot wait until Monday, like a door that will not close ahead of an incoming storm. Financing through Hearth is available for larger projects so a needed repair does not have to wait for the right month.
We focus on quality work built for long term performance, which means using the right materials and correcting root causes rather than covering symptoms. Every job is done with the goal of five star service, and our reputation in this community depends on getting it right the first time. Call us at (979) 383-2445 or email derick@secureoverhead.com to schedule an inspection and get your garage sealed properly.